

How To Connect Iphone 3gs To Itunes
iTunes is a useful tool for iPhone and iPad users; however this tool also causes many people headache. "iTunes could not connect to my iPhone and only received an invalid response on the device, what can I do to fix it, please help."

Similar questions are common on social media and forums. Apparently, if you cannot connect iPhone to iTunes, the backup, restore, purchase and other features in iTunes become useless. To help you use Apple's utility, we are going to show you how to connect iPhone to iTunes correctly. Plus, you can learn troubleshooting related to iTunes in this tutorial.
- Part 1: How to connect iPhone to iTunes
- Part 2: How to Fix iTunes Could Not Connect to iPhone
- Part 3: Set iTunes to sync your iOS device over Wi-Fi
- Part 4: Best iTunes alternative to transfer iOS files
Part 1. How to connect iPhone to iTunes
To avoid various errors, you can follow the steps below to connect iPhone to iTunes successfully.
Step 1. Open the latest version of iTunes on your computer. You can check update in "iTunes" > "Check to Update" on Mac or "Help" > "Check to Update" on Windows.
Step 2. Connect your iPhone to your computer using the original Lightning cable. And wait for iTunes to detect your device.
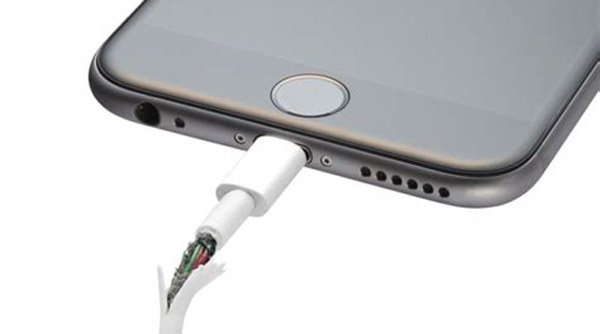
Do not use a third party USB cable to replace the Lightning cable.
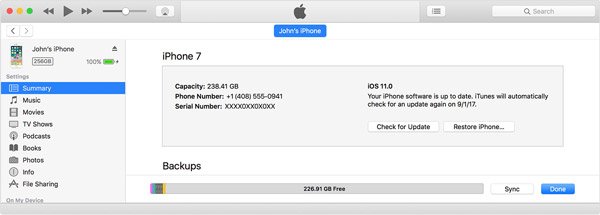
Step 3. When you see an iPhone icon appears at upper left corner, it means the connection is successful. Otherwise, troubleshooting of the problem is in the next part.
Note: iTunes on macOS Catalina/Big Sur has been replaced and you can check this post to open iPhone in Finder on Mac.
Part 2. How to Fix iTunes Could Not Connect to iPhone
In some cases, even though use the new version of iTunes, you may encounter the problem cannot connect iPhone to iTunes. Here is effective troubleshooting for fixing this problem.
Troubleshooting 1: Try a different USB cable
Connect your iPhone to iTunes, but there is nothing happens? The starting point of troubleshooting is to check the Lightning cable. Make sure there is no sign of breakage or damage. Next, disconnect your iPhone, the cable and the computer, reconnect them again and see whether iTunes works fine. If not, you have to try a different Lightning cable.
Troubleshooting 2: Restart iPhone and computer
In most cases, restarting your devices could fix the issue of cannot connecting iPhone to iTunes quickly.
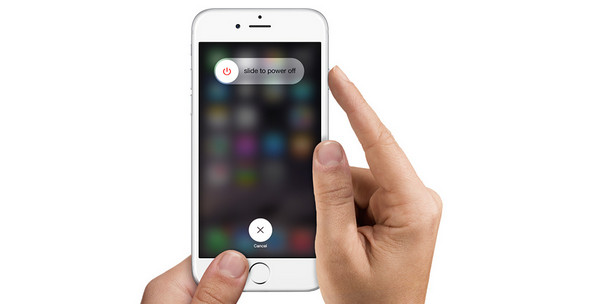
Step 1. Disconnect your iPhone from your computer. Press the hardware button combination to force-restart it.
iPhone X/8: fast press and release the "Volume Up" button, do the same on Volume Down button, and hold the Side button until iPhone turns on.
iPhone 7: hold both Volume Down and Side buttons, release them when you see Apple logo.
iPhone 6 or earlier: the combination is Home + Side buttons.
Step 2. Reboot your computer, and reconnect iPhone and iTunes to check if the connection is successful.
Troubleshooting 3: Update software
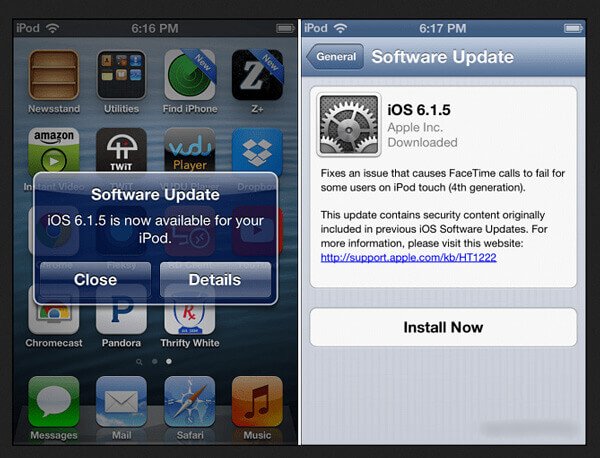
Outdated software is another reason why cannot connect iPhone to iTunes. The solution is simple, update software instantly.
Step 1. Head to "Settings" > "General" > "Software Update" and tap Download and Install button if there is an update.
Step 2. Input your PIN passcode when prompted and complete software update. Next, try iPhone and iTunes connection again.
Software update can also helps fix iPhone will not play videos, which is caused by outdated iOS software.
Troubleshooting 4: Reinstall Apple's Windows Drivers
If the cannot connect iPhone to iTunes problem happens on Windows, there may be something wrong on Apple's Windows Drivers.
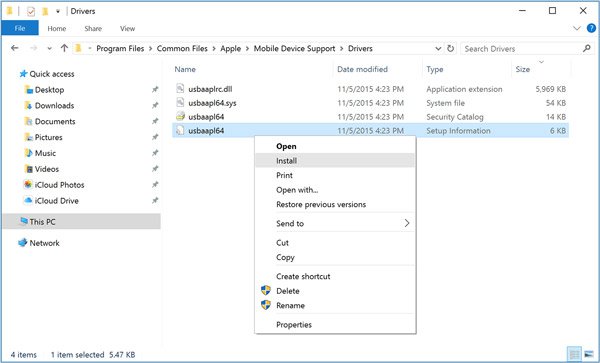
Step 1. Open your Computer Manager and check the "Apple Mobile Device USB Driver" entry under "Universal Serial Bus Controllers", there is an alter mark, right click on it and select "Enable to fix it.
Step 2. Navigate to (C:)-> ProgramFiles-> Common Files-> Apple-> Mobile Device Support-> Drivers. Right click on the file titled usbaapl64.inf or usbaapl.inf and pick Install to reinstall Apple's Drivers.
Step 3. Now reconnect iPhone and iTunes, you can make sure they should work normally.
Troubleshooting 5: Ultimate way to fix iTunes could not connect to iPhone
If you have tried the troubleshooting above and still cannot connect iPhone to iTunes, Apeaksoft iOS System Recovery may help you fix this problem. It is able to fix a variety of software errors in DFU mode with no data loss.
Step 1. Install iOS System Recovery to your computer
Get the right version of iOS troubleshooting tool to your computer based on the operating system. Use the Lightning cable that came with your device to link it to your computer.
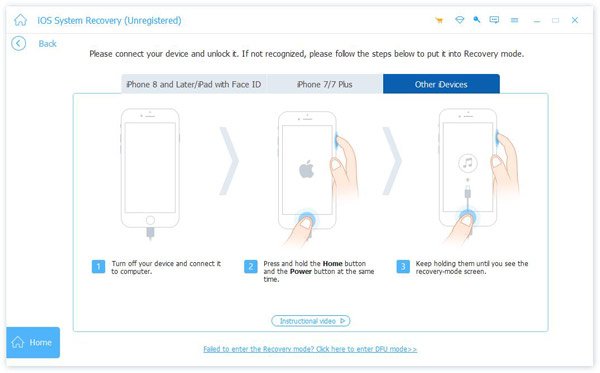
Step 2. Diagnose device in DFU mode
Run OS System Recovery and click the "Start" button. Then choose the "Question" icon and put your device to DFU mode following the onscreen guide.
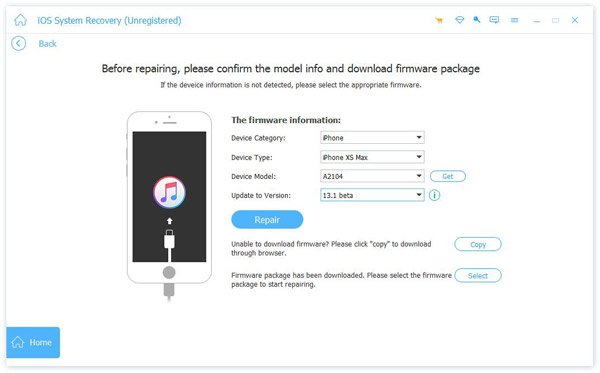
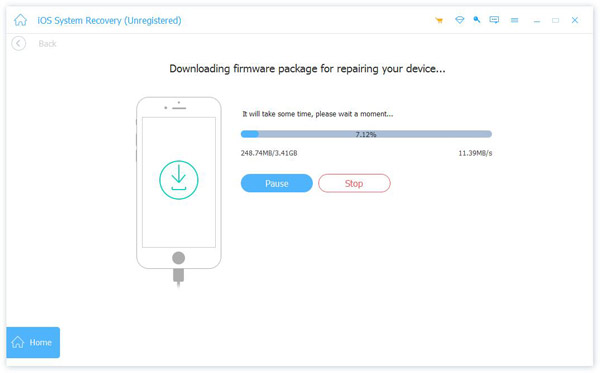
Step 3. Fix cannot connect iPhone to iTunes
Fill in the Info window according to your device model. Click the "Download" button to obtain necessary firmware and fix software issues automatically. When iPad disabled connect to iTunes, you can also rely on this powerful iOS system fixing software.
Part 3. Set iTunes to sync your iOS device over Wi-Fi
iTunes offers various way to sync iPhone. Besides connecting iPhone to iTunes, you can sync iOS device over Wi-Fi as well.
Step 1. Start the iTunes application and use the Lightning cord to connect your iOS device to your computer.
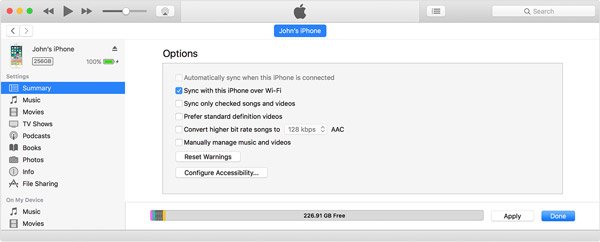
Step 2. Click your device icon, go to the "Summary" tab, and check "Sync with this [device] over Wi-Fi" on right side.
Step 3. Choose "Apply" and then remove your iPhone from the computer. Next time when the computer and your iOS device connect to the same Wi-Fi network, your device will appear in iTunes and start syncing.
Part 4. Best iTunes alternative to transfer iOS files
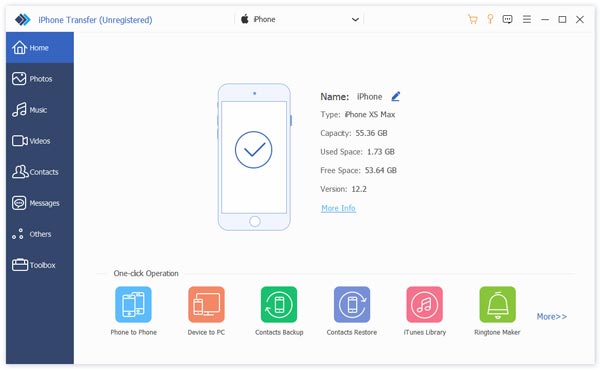
Looking for an iTunes alternative? iPhone Transfer could meet your demands. Its main features include:
In short, it is the alternative of connecting iPhone to iTunes.
How to transfer iPhone to computer without iTunes
Step 1. Launch iPhone Transfer after installing it on your computer. Hook up your iPhone to your computer via USB cord. The application will recognize your device spontaneously.
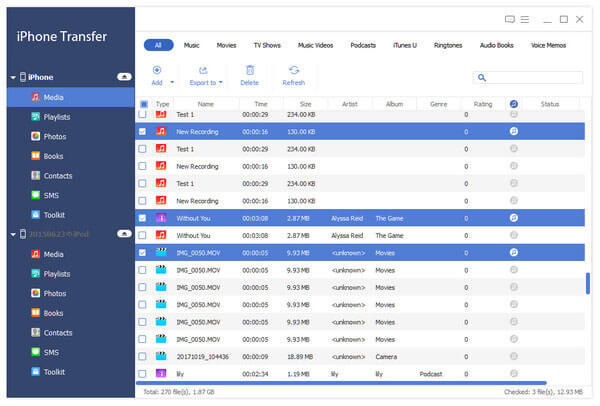
Step 2. Press your device name and select data types, such as Music, Photos, and more, on left side before transferring. Then you can preview details on right panel and select specific files.
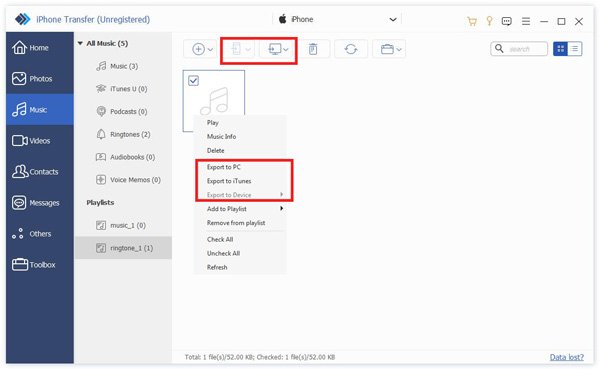
Step 3. After selecting, unfold the "Export to" menu on top ribbon and pick "Export to PC" to save desired data from iPhone to computer instantly.
You may also want to know how to delete duplicates in iTunes with ease.
Conclusion
We have shared some basic knowledge about connecting iPhone to iTunes in this tutorial, such as how to connect them correctly, how to set iTunes to sync iPhone over Wi-Fi, how to troubleshoot when iPhone cannot connect to iTunes. Moreover, you can learn about the best iTunes alternative as well.
How To Connect Iphone 3gs To Itunes
Source: https://www.apeaksoft.com/itunes/iphone-will-not-connect-to-itunes.html
Posted by: russfrompont.blogspot.com
0 Response to "How To Connect Iphone 3gs To Itunes"
Post a Comment